> ## Documentation Index
> Fetch the complete documentation index at: https://rive-docs-editor-keyboard-shortcuts-accuracy.mintlify.site/llms.txt
> Use this file to discover all available pages before exploring further.
# Components (formerly Nested Artboards)
> Components streamline your workflow with reusable artboards and animations. Changes made to the source component are reflected across all of its instances.
export const YouTube = ({id, timestamp}) => {
const videoSrc = timestamp ? `https://www.youtube.com/embed/${id}?start=${timestamp}` : `https://www.youtube.com/embed/${id}`;
return ;
};
## Creating a Component
Any artboard can be converted to a component. To do so, select an artboard on the stage and use the component icon in the inspector to toggle its status.
Alternatively, you can use the `Shift` + `N` shortcut with an artboard selected. If you're coming from Figma, then the `Cmd/Ctrl` + `Alt/Option` + `K`, shortcut will also work.
Select the component toggle in the inspector again to revert your selection back to a regular artboard, or use the `Shift` + `Alt/Option` + `N` shortcut.
Currently, only artboards that have been flagged as components will be exported to your `.riv` file. If you think you may want to programmatically access an artboard at runtime, you should mark it as a component. More options on specific export behaviors are coming soon.
## Using Components
Use the Component Tool — formerly known as the Nested Artboard Tool — to select and place instances of a component on the stage. Select the tool from the toolbar or use the `N` shortcut to enable it.
Click anywhere on the stage to place the component in the desired location. A menu will display available components to instance. If none show up, you may have no artboards marked as components in your file.
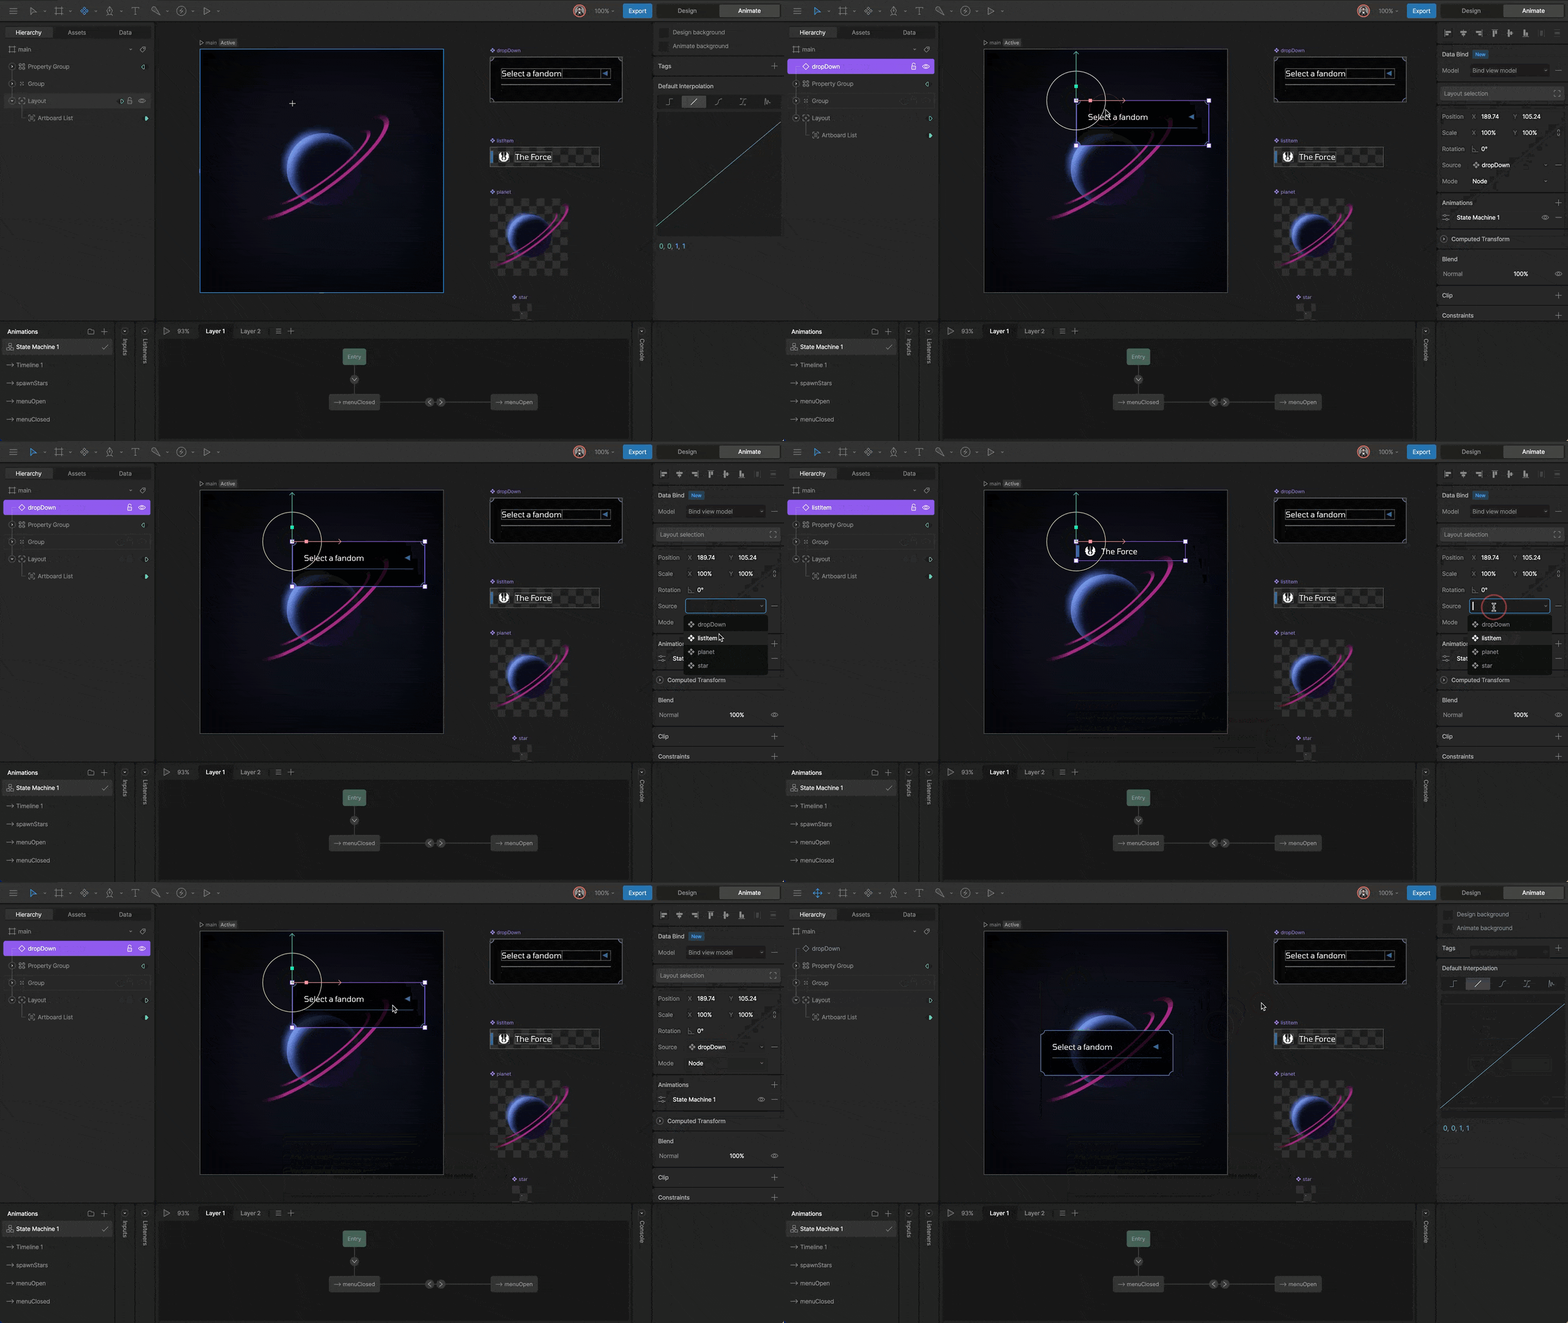 Alternatively, select the dropdown menu to the right of the toolbar icon to select the component ahead of time. The menu is informed by the sort mode of the assets tab — the 'Custom' mode will present components as they’re organized in the asset panel, while the 'Source/Type' mode will present components from their source. The latter will become useful with our Libraries feature.
## Configuring a Component Instance
Once you’ve added an instance of a component, select a timeline or state machine for playback.
### State Machines
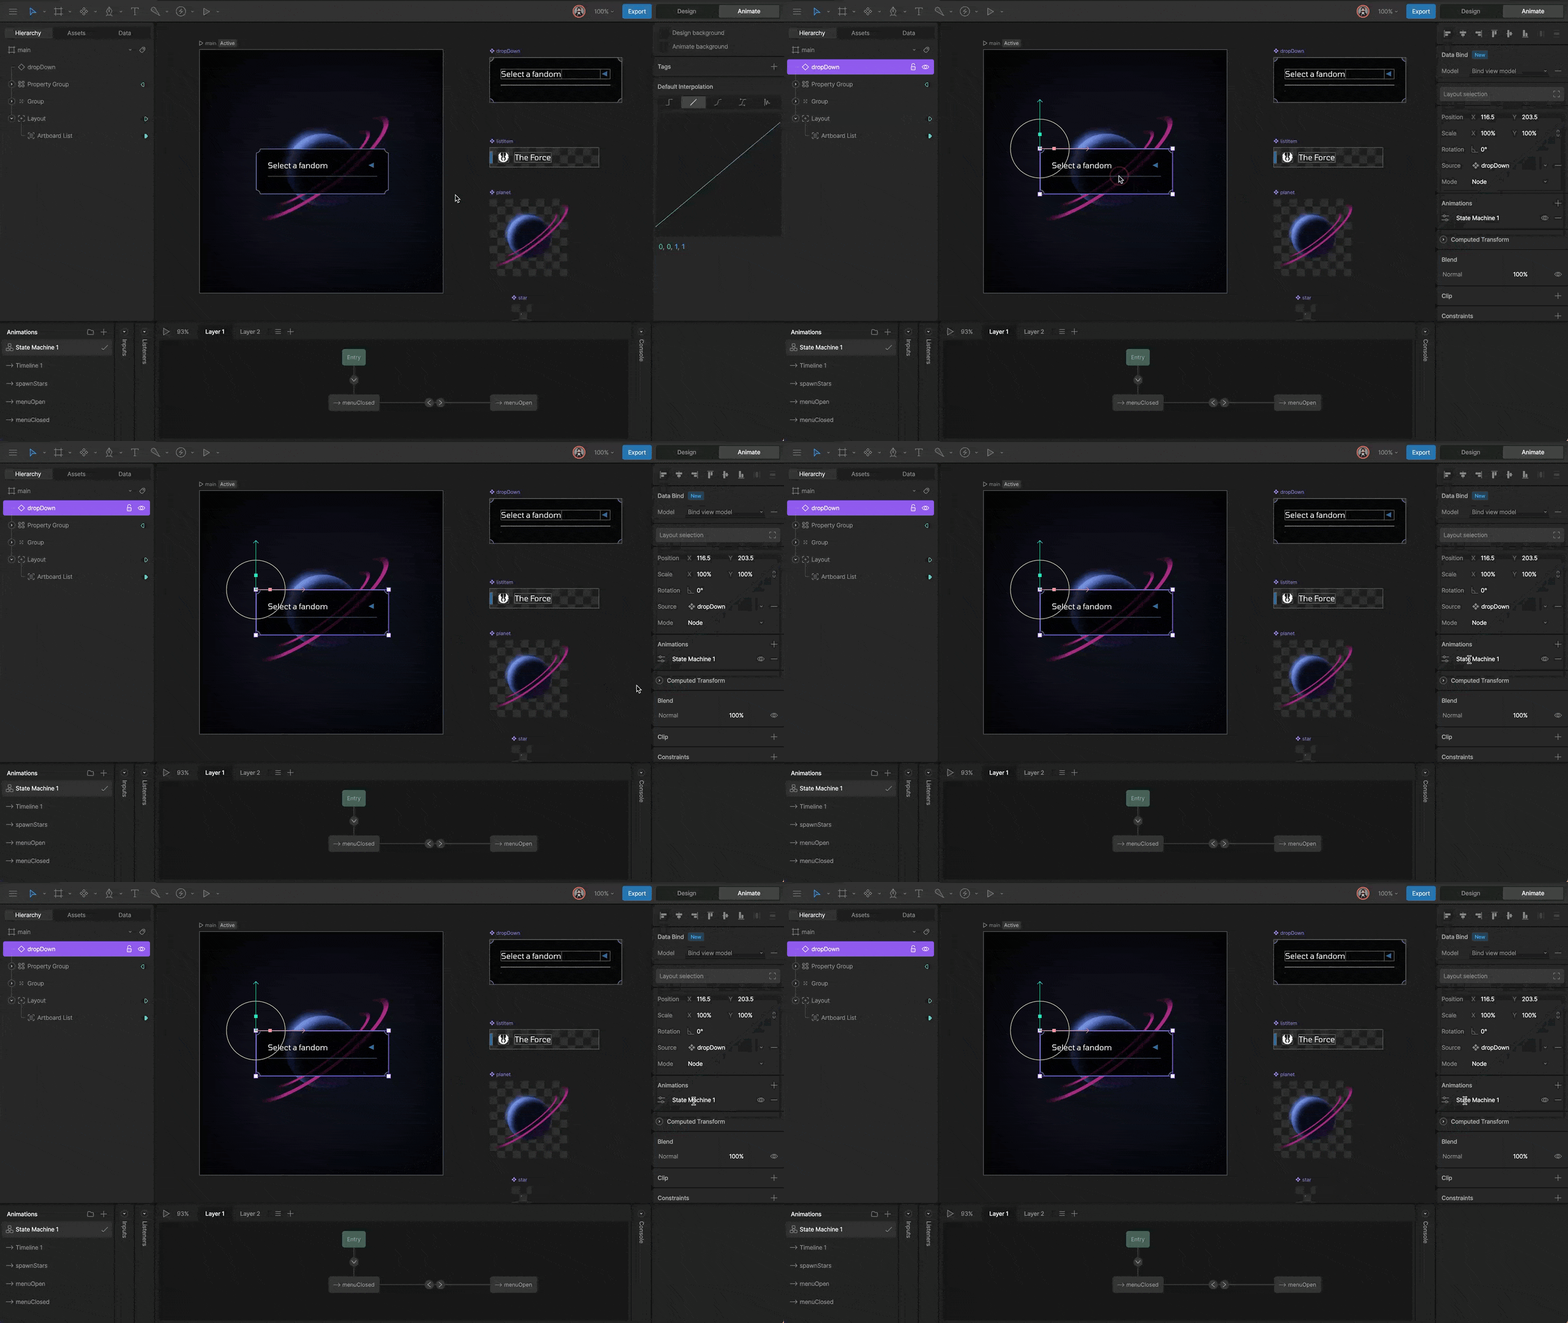
After assigning an instance, the default state machine is displayed in the inspector.
Alternatively, select the dropdown menu to the right of the toolbar icon to select the component ahead of time. The menu is informed by the sort mode of the assets tab — the 'Custom' mode will present components as they’re organized in the asset panel, while the 'Source/Type' mode will present components from their source. The latter will become useful with our Libraries feature.
## Configuring a Component Instance
Once you’ve added an instance of a component, select a timeline or state machine for playback.
### State Machines
After assigning an instance, the default state machine is displayed in the inspector.
 ### Adding an Animation
You can playback any animation associated with a component. You’ll need to add the desired animation to the instance using the plus button in the Inspector.
### Adding an Animation
You can playback any animation associated with a component. You’ll need to add the desired animation to the instance using the plus button in the Inspector.
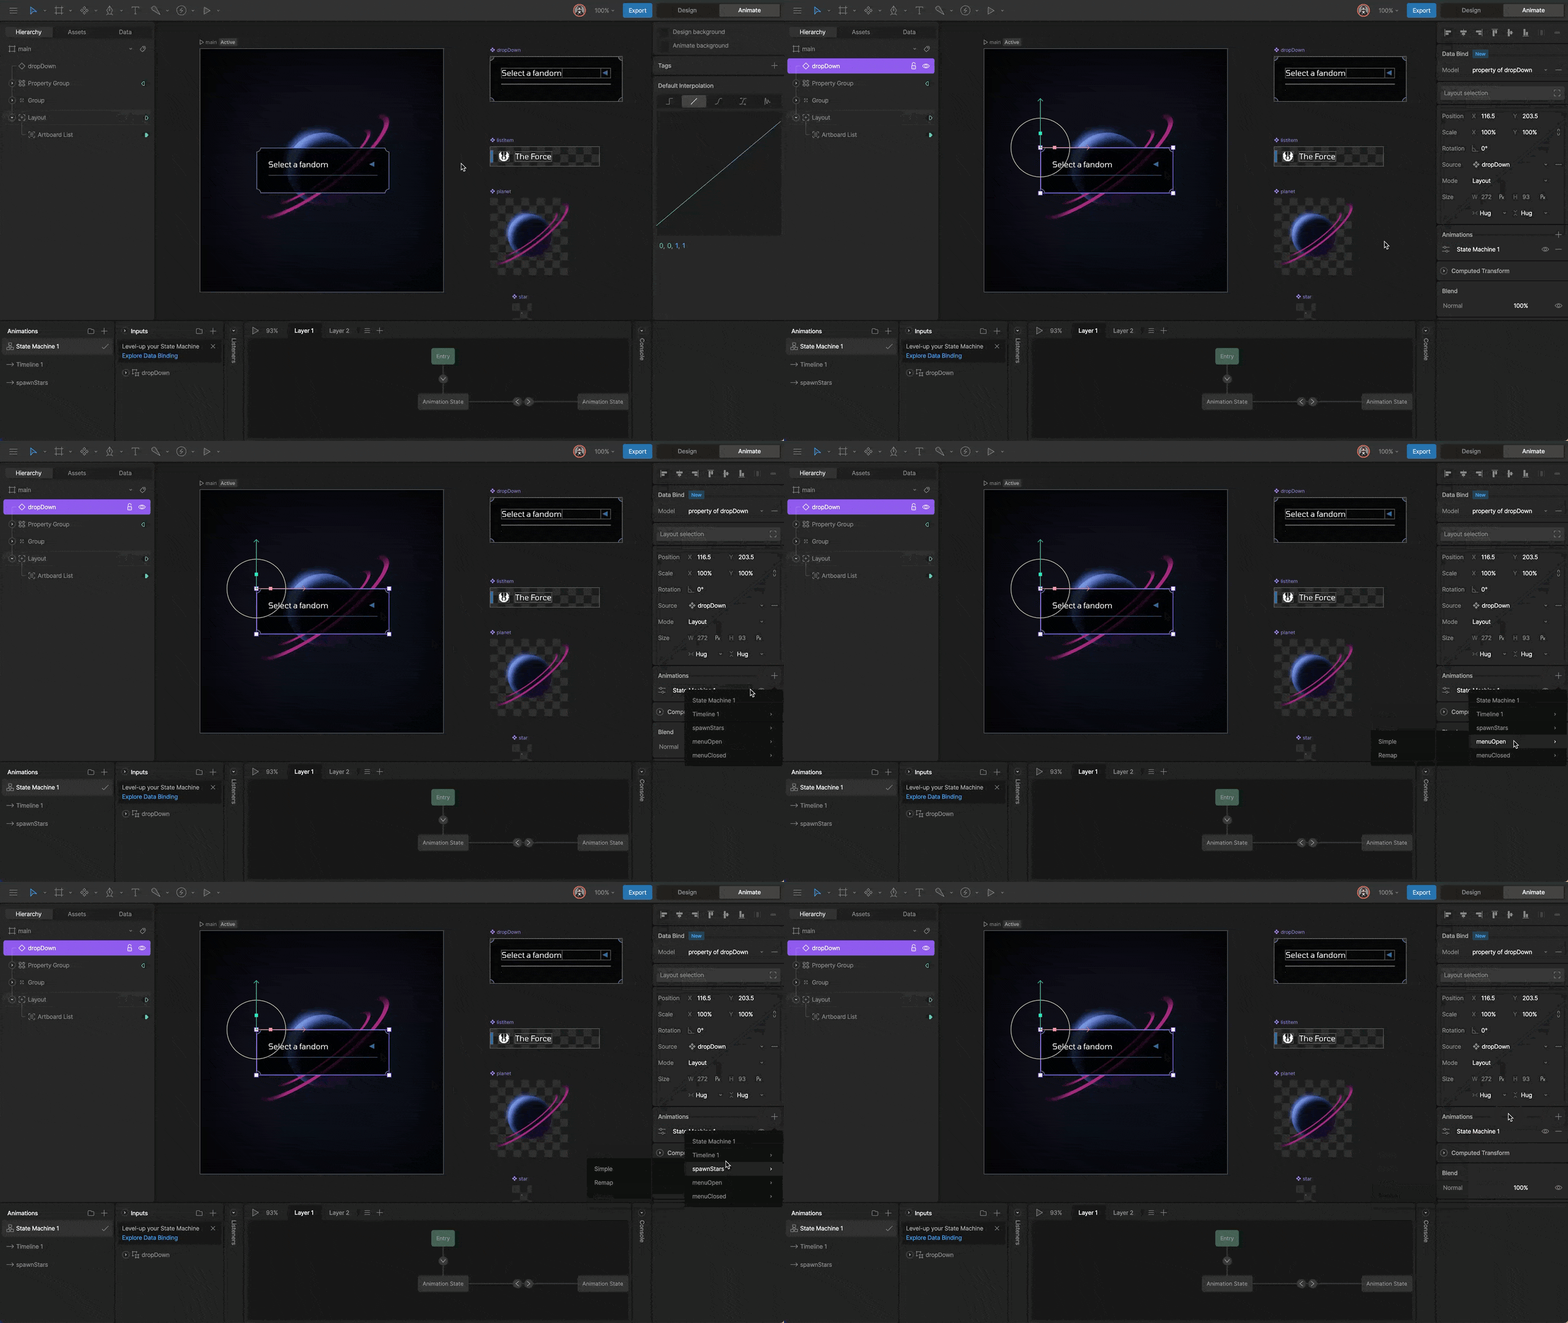 These animations can be used by themselves, mixed with the state machine, or layered with other animations.
Note that before adding the animation, you must select whether it's a simple or remapped animation.
#### Simple
Simple animations are an easy way to playback a component's timeline.
These animations can be used by themselves, mixed with the state machine, or layered with other animations.
Note that before adding the animation, you must select whether it's a simple or remapped animation.
#### Simple
Simple animations are an easy way to playback a component's timeline.
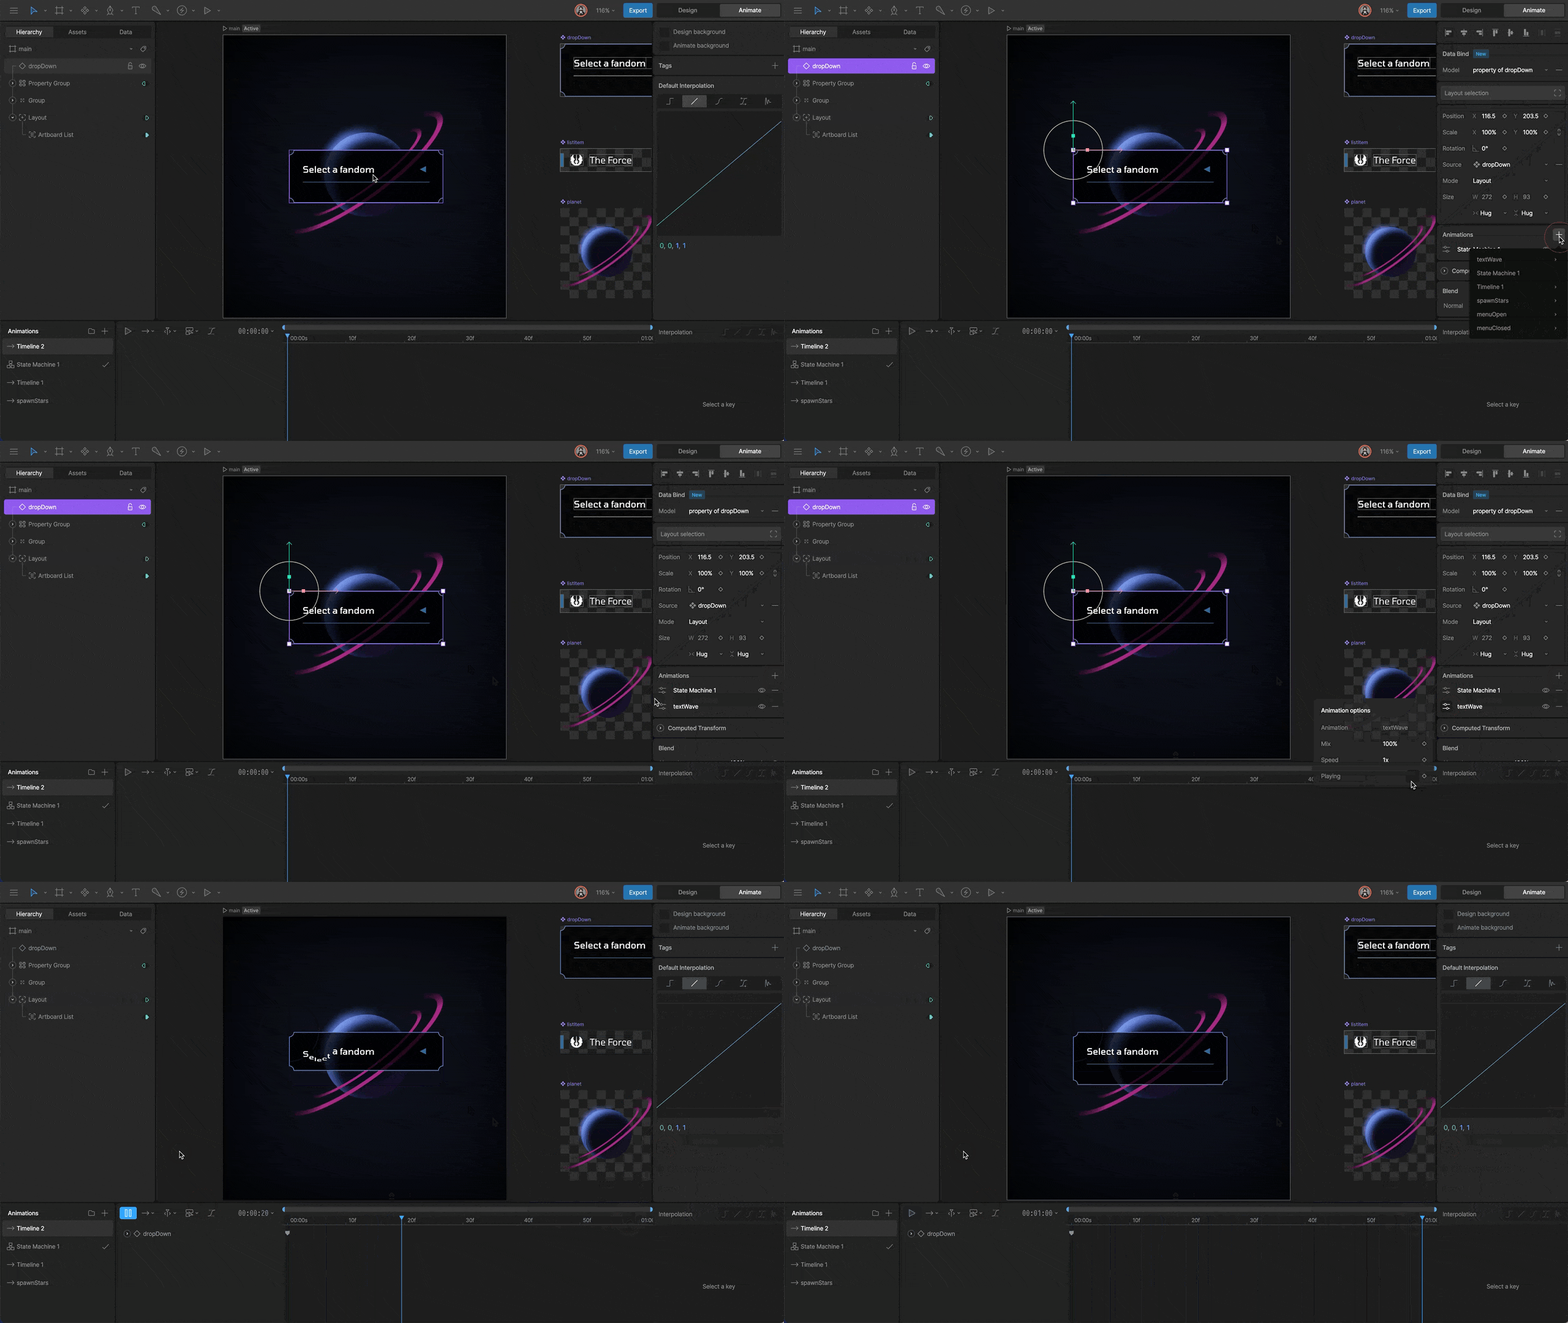 A simple animation lets you key its start point on a timeline. You also have the option to change the animation's playback speed.
#### Remap
Remap animations allow you to key time values of an animation on the timeline. This lets you stretch, shrink, or even play an animation in reverse.
A simple animation lets you key its start point on a timeline. You also have the option to change the animation's playback speed.
#### Remap
Remap animations allow you to key time values of an animation on the timeline. This lets you stretch, shrink, or even play an animation in reverse.
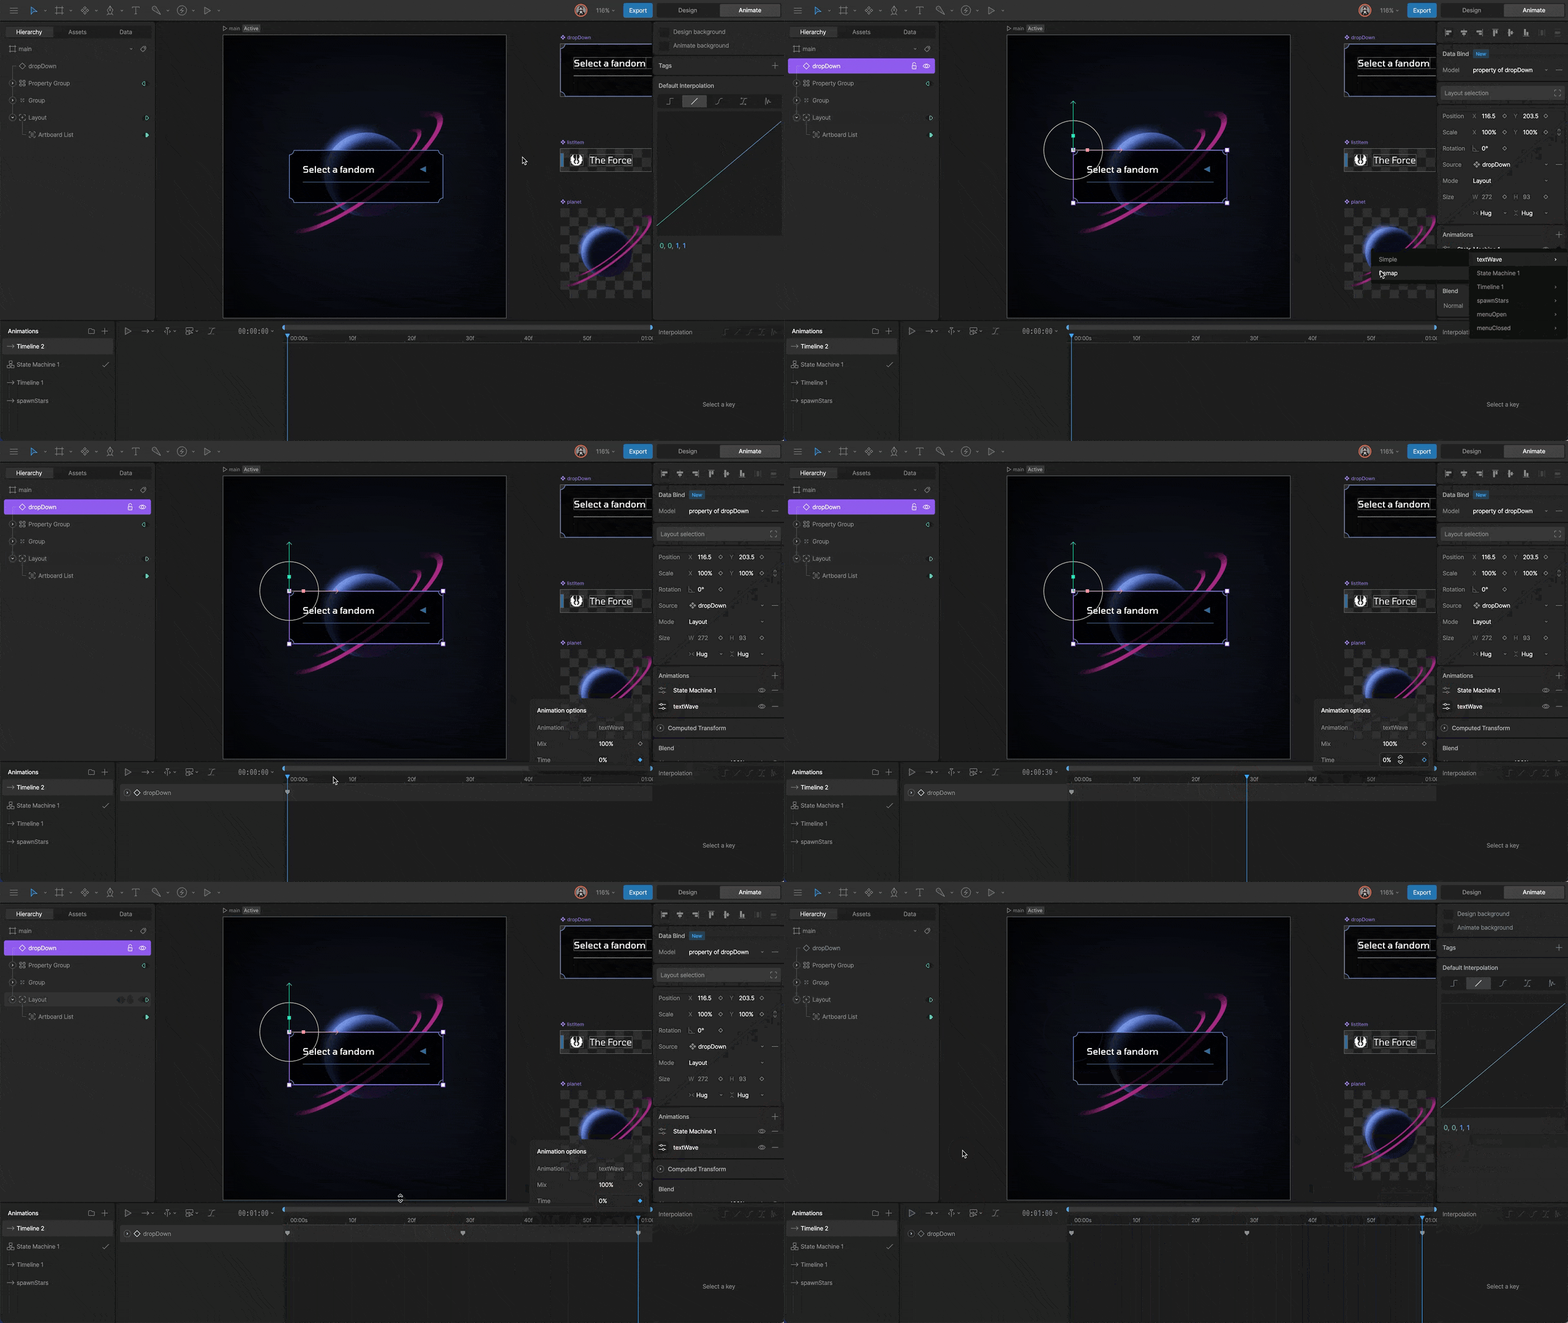 Note that the time value is in percent, with 0% representing the start of the timeline and 100% representing the end.
### Mix Value
As you add additional animations to a Component, animations begin to mix together. This mixing is important, especially when multiple animations share keyed properties. Without adjusting this value, your Component may not playback your animations in the way you want.
By default, any animation added to a component starts with a mix value of 100%. You can adjust this value in design mode or in a specific animation by setting keys. **Note that an animation that has a non-zero mix value will always be mixing with other animations, regardless if it has a play key set or not.**
To ensure the correct animation is playing, ensure that you key the mix value for the desired animation to 100%, and all other animations have a mix of 0%.
### Mode (Component Sizing)
Component instances can use **Node**, **Leaf**, or **Layout** sizing to control how they respond to the space available from their parent.
See [Component Sizing](/editor/layouts/component-sizing) to learn how each option scales, fits, or reflows a component.
Note that the time value is in percent, with 0% representing the start of the timeline and 100% representing the end.
### Mix Value
As you add additional animations to a Component, animations begin to mix together. This mixing is important, especially when multiple animations share keyed properties. Without adjusting this value, your Component may not playback your animations in the way you want.
By default, any animation added to a component starts with a mix value of 100%. You can adjust this value in design mode or in a specific animation by setting keys. **Note that an animation that has a non-zero mix value will always be mixing with other animations, regardless if it has a play key set or not.**
To ensure the correct animation is playing, ensure that you key the mix value for the desired animation to 100%, and all other animations have a mix of 0%.
### Mode (Component Sizing)
Component instances can use **Node**, **Leaf**, or **Layout** sizing to control how they respond to the space available from their parent.
See [Component Sizing](/editor/layouts/component-sizing) to learn how each option scales, fits, or reflows a component.